Hiển thị các bài đăng có nhãn IT. Hiển thị tất cả bài đăng

How to install phpmyadmin on linux mint 13

Phpmyadmin is open source tool to manage MYSQL databases . It uses web interface to perform various tasks such as database creation, deletion, modification, managing tables, Export/Import, user managment etc.
This article helps you to install and configure phpmyadmin on linux mint 13.

Install phpmyadmin on linux mint 13.

Before installing phpmyadmin we need to install and configure LAMP ( Apache, Mysql and php).

Installing LAMP.

Press ALT + CTR + T to open terminal.
Step 1 » Update repository.krizna@leela:~$ sudo apt-get update
Step 2 » Issue the below command to install LAMP along with dependencies.krizna@leela:~$ sudo apt-get install lamp-server^You must include ^ [caret symbol] at the end.
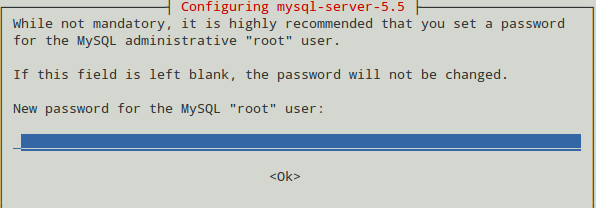
This above command will install Apache, mysql and php. during installation you will prompted to create mysql root password . For detailed installation and testing of LAMP, Refer this post How to install LAMP on linux mint 13

Installing Phpmyadmin.

Step 3 » After LAMP setup and testing, type the below command to install phpmyadmin.krizna@leela:~$ sudo apt-get install phpmyadmin
Step 4 » During installation you will be prompted to choose webserver , just chooseApache and press ok
Install PHPmyadmin on linux mint 13
Step 5 » and again you will get a prompt to configure database, choose “NO” ( we already configured mysql database ) and proceed the installation.
Install PHPmyadmin on linux mint 13
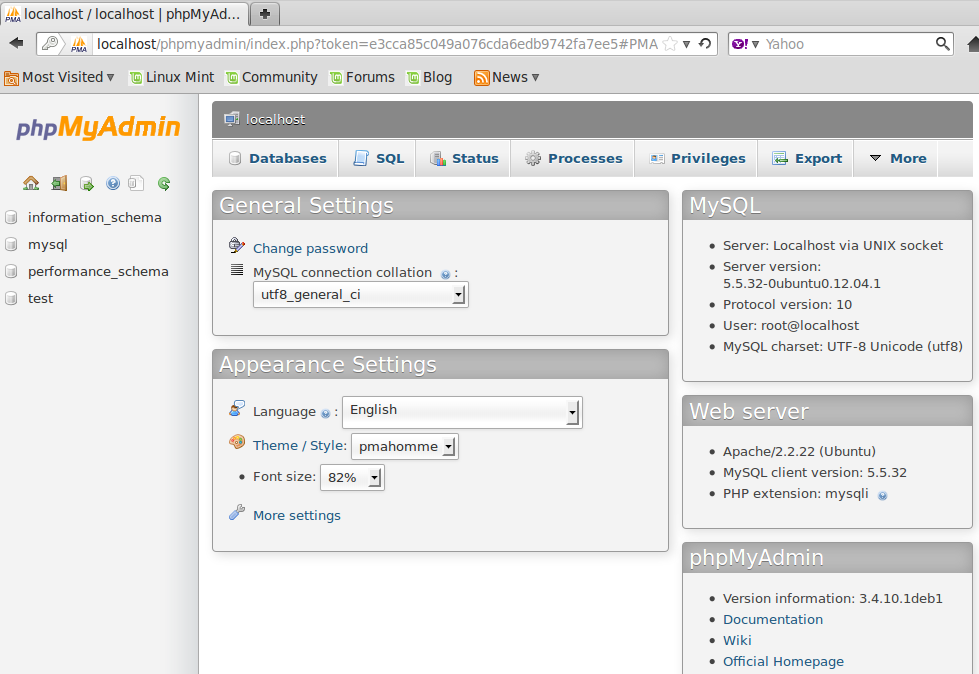
Step 6 » After completing the installation , open http://yourserverip/phpmyadmin ( http://10.0.2.25/phpmyadmin ) in your browser. you will be getting a login screen, user name is root and use mysql root password created during LAMP installation.
Install PHPmyadmin on linux mint 13
If you are getting any error page like “Page not found”. Add the below line in /etc/apache2/apache2.conf file.
Include /etc/phpmyadmin/apache.conf
and restart apache service
krizna@leela:~$ sudo /etc/init.d/apache2 restart

How to install Lamp on linux mint 13

LAMP is basically a software bundle made up of open-source softwares ( Linux –Apache – Mysql or Marimba – Php / Perl / Python ) . LAMP refers to the first letters of each component .
This article explains the installation and configuration of LAMP on linux mint 13.

Install LAMP on linux mint 13.

LAMP installation in linux mint 13 is very simple, we can install using a single command .
Press ALT + CTR + T to open terminal.
Step 1 » Update the repository.
krizna@leela:~$ sudo apt-get update
Step 2 » Issue the below command to install apache,mysql and php along with dependencies.
krizna@leela:~$ sudo apt-get install lamp-server^Don’t forget to include ^ [caret symbol] at the end.
Step 3 » During the installation, you will be prompted to create root password to access mysql database. Type your password and complete the installation
Install LAMP linux mint 13Now you have successfully installed LAMP ( Apache , mysql and php ).
Step 4 » Now add the below line to /etc/apache2/httpd.conf file to avoid warning during apache service restart.
ServerName localhost
Step 5 » Restart apache service .
krizna@leela:~$ sudo /etc/init.d/apache2 restart

Testing

Now check the installed components one by one.
Apache testing
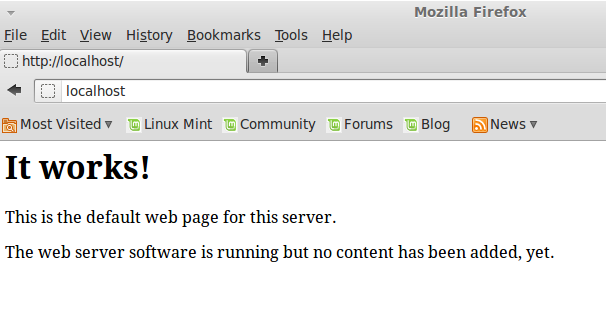
Step 6 » Open http://localhost or http://youripaddress (http://10.0.2.15) in your browser. you can see the page like below.
Install LAMP linux mint 13
Mysql testing
Step 7 » Type the below command in the terminal and type your mysql root password which is created during the installation.You can login to your mysql database and can see the below things.
krizna@leela ~ $ mysql -u root -p
Enter password:
Welcome to the MySQL monitor. Commands end with ; or g.
Your MySQL connection id is 46
Server version: 5.5.32-0ubuntu0.12.04.1 (Ubuntu)
Copyright (c) 2000, 2013, Oracle and/or its affiliates. All rights reserved.
Oracle is a registered trademark of Oracle Corporation and/or its
affiliates. Other names may be trademarks of their respective
owners.
Type 'help;' or 'h' for help. Type 'c' to clear the current input statement.
mysql>

PHP testing
Step 8 » Create a file /var/www/phpinfo.php and add the below code .
Now open http://localhost/phpinfo.php in your browser. you can see the page like below.
Install LAMP linux mint 13
You can see all the configuration details in that page .

Testing All together

We can test mysql connectivity through php.
Create a file /var/www/dbtest.php and add the below code and replace your dbpassword in that code.
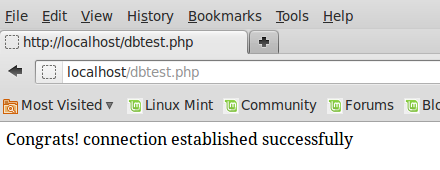
Now open http://localhost/dbtest.php in your browser. you can see the msg “Congrats! connection established successfully” ..
Install LAMP linux mint 13
you did it …
Good luck

How to install dropbox on linux mint 13

Dropbox is a popular online file sharing service used to sync files between computers , laptops , mobiles and tablets . you can also share files to your friends.
it has a reliable apps for all kind of operating systems. This article helps you to install dropbox on linux mint 13.

Install dropbox on Linux mint 13

Open terminal ( CTRL + ALT + t ) and follow the steps.
Dropbox is added in the linux mint 13 repository by default , you just need to install and configure.
Step 1 » Type the below command to update the repository.krizna@leela ~$ sudo apt-get update
Step 2 » After updating the repositories install dropbox using the commandkrizna@leela ~$ sudo apt-get install dropbox
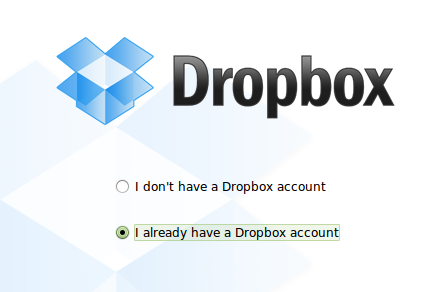
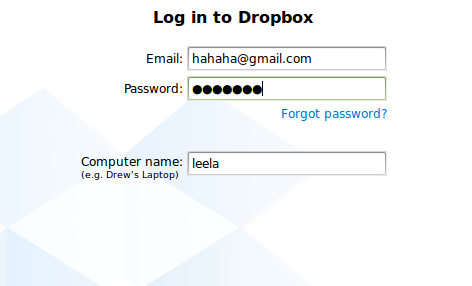
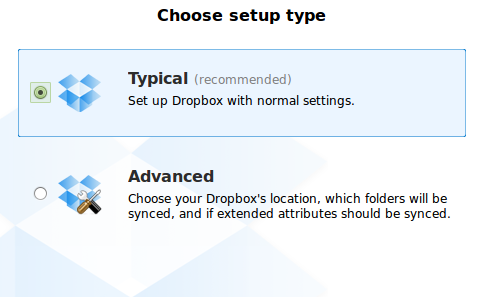
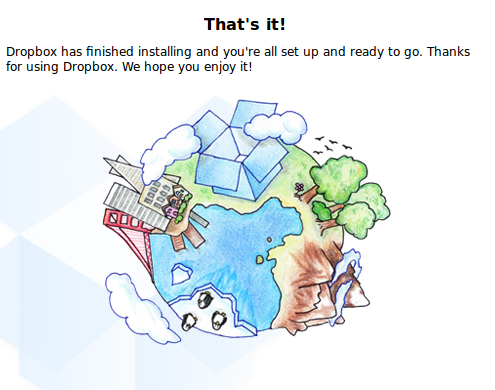
Step 3 » After installation , you can launch Dropbox under “internet” and start configuring your account . Follow the images ..
Install dropbox linux mint 13
Install dropbox linux mint 13Install dropbox linux mint 13
Install dropbox linux mint 13
Now dropbox will start syncing your files from the account.

Setup File server on ubuntu 14.04 ( Samba )

Samba is a free software used to enable file and print services on unix-like systems. It runs on most unix variants, such as Linux, AIX, Solaris and BSD.
This article helps you to set up file server on ubuntu 14.04 server. This article contains steps for creating both anonymous ( without username and password ) and secured shares .
1. Anonymous share.
2. Secured share.
3. User creation.

Setup File server on ubuntu 14.04

Step 1 » Install samba packages after updating repositories
krizna@leela:~$ sudo apt-get update
krizna@leela:~$ sudo apt-get install samba samba-common python-glade2

Creating Anonymous share

Everyone can access and store files without username and password .
Step 2 » Create folder for Anonymous share.
krizna@leela:~$ sudo mkdir -p /shares/anonymous
Step 3 » Change the ownership to nobody so that everyone can access and store files in that folder.
krizna@leela:~$ sudo chown nobody:nogroup /shares/anonymous/
Step 4 » Now define values in samba configuration to share /shares/anonymous/folder. /etc/samba/smb.conf is the main configurion file for samba .
Take a backup before editing that file .
krizna@leela:~$ sudo cp /etc/samba/smb.conf /etc/samba/smb.conf.orgnow add the below code at the end of the file to enable share.
krizna@leela:~$ sudo vim /etc/samba/smb.conf
Step 5 » Now restart smbd service .
krizna@leela:~$ sudo service smbd restart
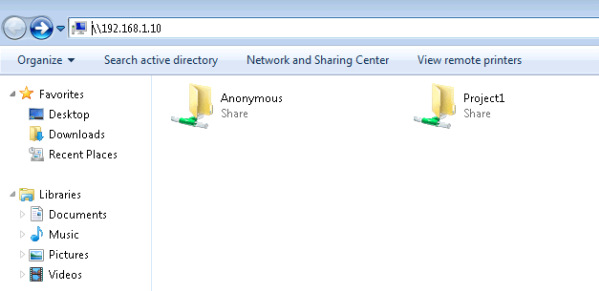
After restarting service . Try to access share from windows client (Goto -> RUN ->\serverIP ) . you could access anonymous share folder without username and password, try to create or copy files to that folder.

Creating secured share

Secured shares can be accessed using username and password .Here for example, I’m going to create share project1.
Step 6 » Create a folder for share .
krizna@leela:~$ sudo mkdir -p /shares/project1
Step 7 » Create a new group smbproj1,so that Users added to this group can access project1 share.
krizna@leela:~$ sudo addgroup smbproj1
Step 8 » Modify ownership and permission for the folder.
krizna@leela:~$ sudo chown root:smbproj1 /shares/project1/
krizna@leela:~$ sudo chmod 770 /shares/project1/

Step 9 » Now define values in the configuration file .
krizna@leela:~$ sudo vim /etc/samba/smb.conf
Step 10 » Now restart smbd service .
krizna@leela:~$ sudo service smbd restartAfter restarting service, you could see Project1 share . Additional secured shares can be created in the same way.
setup file server on ubuntu 14.04

User creation

Add new user john for accessing project1 share
Step 11 » Create a user john .
krizna@leela:~$ sudo useradd john -s /usr/sbin/nologin -G smbproj1-s /usr/sbin/nologin : Restricting shell access
-G smbproj1 : Added to smbproj1 group
Step 12 » Create samba password for user john
krizna@leela:~$ sudo smbpasswd -a john
Now user john can access Project1 share. Additional users can be added in the same way.
For existing users use usermod command to add user in smbproj1 group and create samba password using smbpasswd.
krizna@leela:~$ sudo usermod mike -G smbproj1
For accessing multiple shares. Example: dave has access to multiple project groups like smbproj1 and smbproj2.
krizna@leela:~$ sudo usermod dave -G smbproj1,smbproj2
For troubleshooting, Use testparm command
For more info Samba file server guide
That’s it. Have a nice day.